.png?height=120&name=Side%20Logo%20(1).png)
Initial exercise in using the Multi-PIP

What’s in the Box?
-
Multi-PIP Base Unit
-
Mini-USB cable
-
3 meter SMA male to SMA male cables (x16)
-
Plant probes (x8)
Install the Software
-
Visit the downloads page
Connect to PC
-
Using the included Mini-USB cable, connect the Multi-PIP to a USB port on your Windows 10 PC.
-
Launch the Multi-PIP software
-
Search for connected devices using the magnifying glass
-
Click the “Connect” button to connect and configure your Multi-PIP. When the Multi-PIP is connected, the button will turn red, display “Disconnect”, and the device information will be populated

-
If your version of the software and device firmware do not match you will need to upgrade the Multi-PIP device before you are able to connect. Follow the on-screen prompts to perform a firmware upgrade

Making a Scheduled Measurement
Configure the Scheduled Measurement
-
Launch the Multi-PIP software.
-
Download the example Multi-PIP configuration ‘Multi_PIP_example_config.mpcfg’ file on the downloads page.
-
After connecting to the Multi-PIP in the software, hit the ‘Import’ button and import the Multi-PIP example configuration.
-
Hit the ‘Apply’ button to apply the configuration.
Attach the Plant Probes
-
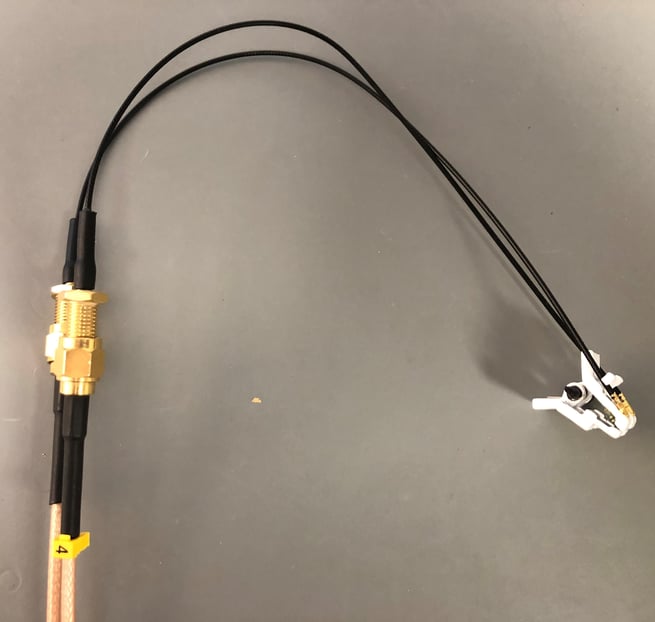
Attach your set of SMA-SMA cables to the Multi-PIP according to the probe pairs listed in the example configuration. The example pairs A with C and B with D for pair numbers 1-4. For example, A1C1 is “Probe 1” and B1D1 is “Probe 5”. See an example A1C1 connection below.

-
Attach your plant probe to the other end of the SMA-SMA cables. Screw in the SMA heads until they cannot go in any further.
-
Attach the plant probes to a plant. For first time users, attaching to a branch or large stem is recommended, as good placements are not difficult to achieve.
Tip:
When placing probes onto plants, place the electrode side of the clamp on the desired location before allowing the clamp to close around the stem/branch. This way, you may visually ensure that the needles are in the plant and that the placement is not at risk of bending the needles.
Make the Measurement
-
Open the Multi-PIP software and connect to the Multi-PIP.
-
Start the scheduled measurement by hitting the ‘Start’ button. You will see the ‘State’ status in the bottom right-hand corner change to ‘Measuring…', as depicted below. Once the measurement has been completed, the Multi-PIP status will change to 'Started'.
The Multi-PIP is now measuring, you may disconnect it from the software and let it perform the scheduled measurement.

Tip:
Once the Multi-PIP has performed the first measurement, you will be able to see the times for the next and last measurement, as well as the total measurement count on the very bottom panel of the Multi-PIP ‘Configuration’ tab.
Stop the Measurement and Download the Data
-
Open the software and connect to the Multi-PIP.
-
Hit the ‘Stop’ button. This will stop the scheduled measurement.
-
Navigate to the ‘View Data’ tab and hit the blue ‘refresh’ button on the bottom, you will see a data log appear.
-
Hit the green ‘Download’' button to download your data log onto the Multi-PIP. This will also load a preliminary plot of the data associated with the log you loaded.

-
Press the blue ‘Save’ icon next to the green ‘Download’ button. Use the File Navigator to save the data as a CSV to a desired location.

Congratulations, you have just made your first scheduled measurement with the Multi-PIP!
For more detail on configuration and the instrument, please see the User's Guide. For more detail on data visualization and analysis, please refer to the Multi-PIP Analysis Suite. To learn more about data interpretation, see the Impedance Interpretation Guide.